
|
| ||
Towing Basics
Story and Photos by Harry Lewellyn
INTRODUCTION
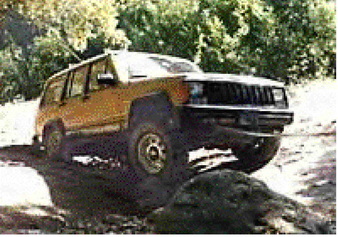
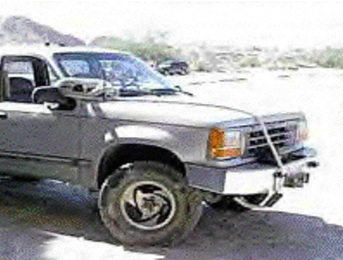
Diagonal teeter-totter disables my old Cherokee
Let there be no doubt: Towing and tugging one vehicle with another can be dangerous. In your well-meaning attempt to help, you may do serious harm. And that should come as no surprise when you consider the size, weight, horsepower and rock-throwing tires of the vehicles we take off road. It is easier than you think to break parts and injure people when towing and tugging.
What I also believe contributes to the mayhem and chaos of towing and tugging is our state of mind. No one likes to get stuck, but it happens to the best of us. It's embarrassing, it delays our progress and could be life- and equipment-threatening in certain situations. As Hurricane Floyd clearly demonstrated, raging waters spare nothing, but that's still no excuse to work unsafely. My intention is to help you safely improve your results on both ends of the towline. Safety will be laced throughout this article. Do not take it lightly!
I'll first fill you in on where and how to hook up. Then I'll address towing. In the follow-up article (January-February 2000), TUGGING BASICS, I'll zero in on the most dangerous process of all - an all out, serious, getem unstuck yank!
ATTACH POINTS
This really happened. I'm working sweep on a ranger-led tour. Ranger passes stuck car and radios me to assist the stranded 2WD. The 4X just ahead is eager to help and offers his new yanker and labor. I hook up my end and he does the other. For this mild, flat sandy pull, I take out the slack, begin to tug, and hear a slight "plink" from behind. Upon inspection, I discovered the helper had attached to the car's license plate bracket!
Some folks have no sense of material strength. You are most likely more aware than that, but how much? Another example drives home my point!
Man and CJ stuck in mud. Unstuck friend attaches to one side of front axle and yanks with great vigor. Displaced front axle now relocated nearer to front bumper. Man and CJ still stuck in mud!
ATTACH RULES
Here are the Coyote's rules of attachment. If your candidate connection is designed to move, or is attached with rubber, do not use it! This eliminates shocks, sway bars, tie-rods, pitman arms, axles, radiators, springs, shackles, A-arms, drive shafts, tail pipes, motor mounts and too many other items to mention. Even modern shock-absorbing bumpers can be worthless. They are designed for push, not pull.
I've got to agree the front axle seems like a pretty substantial piece of hardware, but it moves and has rubber at the shackles. With this no-move, no-rubber thing, I'm trying to steer you to only use the frame or things attached directly to the frame. The forces involved in a full-on, all-out yank are massive.
Things that are attached to the frame may be questionable, too. Some dressemup foo-foo stuff is not designed for serious service. I've seen hooks atop a ¼-inch steel "pretty piece" (brush guard) mangled and bent beyond recognition when used for a hefty tug. This has to do with the added distance and angle from the actual frame. The leverage kinda multiplies the force and twists 'em right outa whack! If you anticipate a serious, hard pull, connect directly and only to the frame.
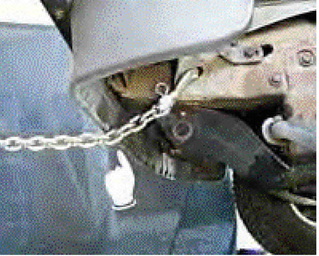
FRAME ATTACHMENT
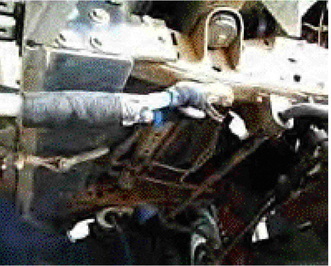
Hooks bolted to frame with hose-protected Towline taped in place.
ow hooks directly attached to the frame are best. However, some ask whether to bolt or weld them on. I prefer to bolt them on. I'm fearful welding will destroy the frame's heat-treating or be weak right at the weld. The average person doing the welding has never been educated about the "heat-affected" zone. That is a region, in the process of welding, between cold and hot metal, that crystallizes and becomes very brittle - weak. It's unavoidable without special attention to the immediate cooling process during welding. The image at the left shows a tow hook bolted to my Explorer frame.
Also, do you have a conventional frame or is it integrated with the body? Integrated frames are typically made from thinner material and thereby weaker. I've seen a Cherokee factory front hook bend and distort the frame. This is due to the integrated (thinner) frame and the fact that the factory hook adds about a one-inch extension to the attach bolts. This adds a "lever" to the pull-force and can bend the frame.
The intersection of the frame and a crosspiece may be another good attach-point. However, this assumes you're right at the corner and the crosspiece is made from approximately the same thickness of steel as the frame. Be aware there are front crosspieces that are little more than dust shields and are very weak. I've seen some made of little more than pressed cardboard!
DOT HOLES
The U.S. Department of Transportation (DOT) ensures there be four frame attach points on every vehicle sold in the USA. The DOT requires a car-carrier hole be located near each tire. I call them dinosaur- or D-holes because car carriers are called dinosaurs. These are elongated holes. They are designed to receive special attachment hardware or a chain slip hook. They are typically in a vertical surface (below left), but may be in a horizontal frame member (below right).
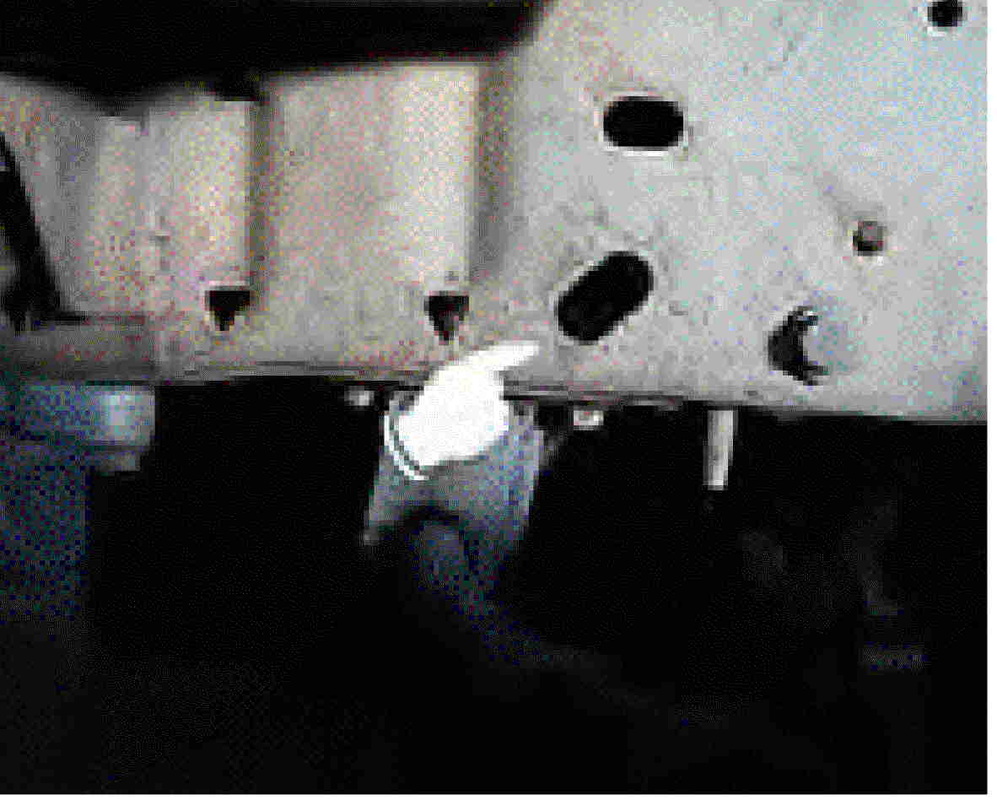
Front vertical D-hole near sway-bar
|
Rear horizontal D-hole near spare tire.
|
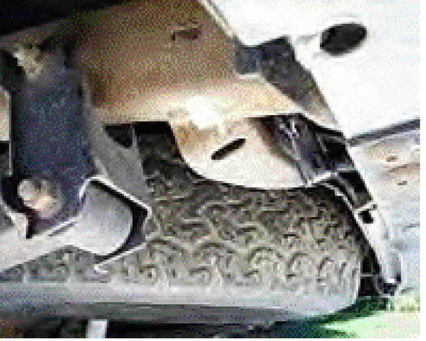
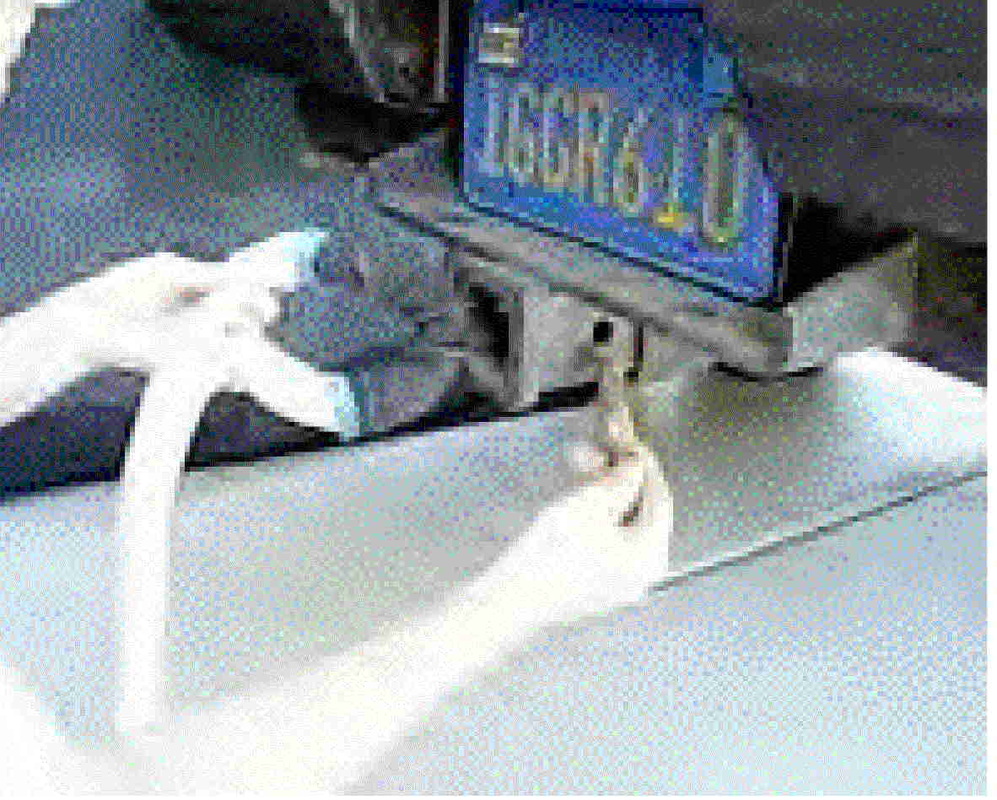
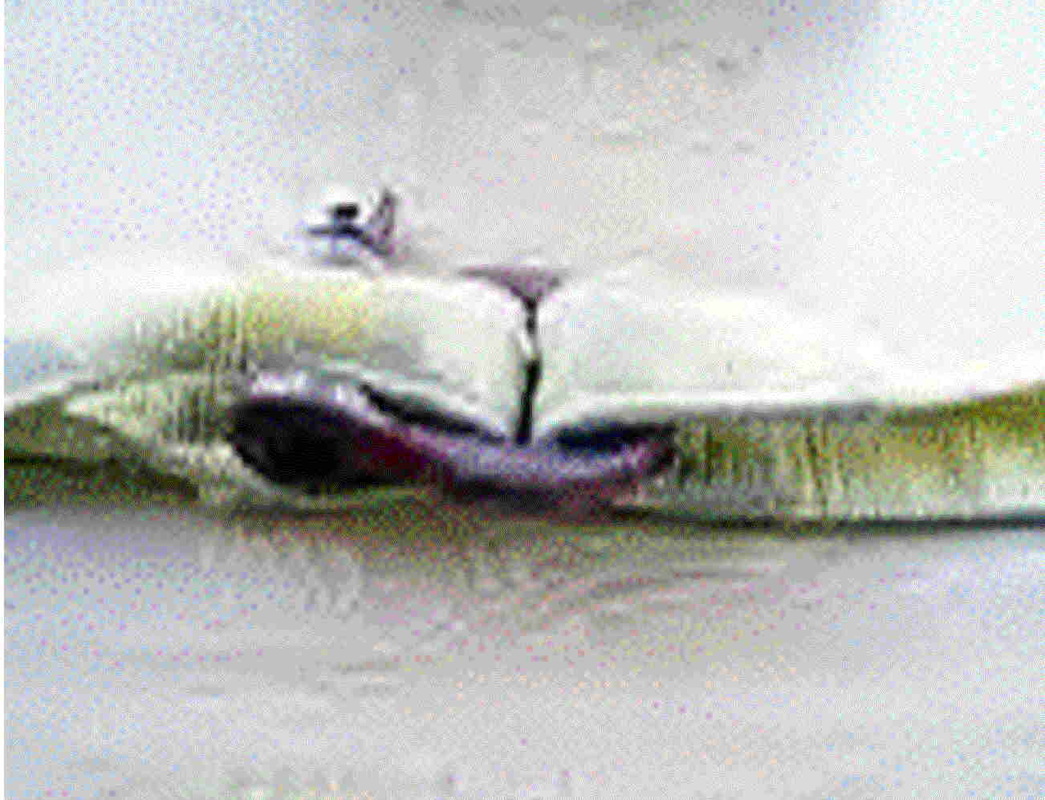
Choke hook in vertical D-hole, but note potential air dam damage.
On 4WDs of the Land Rover variety, they are flat, vertical, egg-shaped pieces attached to the frame with a single bolt. These are definitely not suitable for serious tugging. Even if the bolt were strong enough for hard pulls, they would certainly distort and bend out of place. Avoidusing these for all but the gentlest of tows.
The only problem with D-holes is that they are designed to pull mostly down - vertical - not horizontal. As a result, when you use them, you have to be aware of what your chains, cables, straps and ropes will touch on their journey between vehicles. Typically, you have to either protect the yanker from sharp or hot 4X metal, or the 4X itself from yanker damage. Pay particular attention to the bumper, air dam and body as pictured at the right. In this case, a hard pull will lift the chain and damage the air dam.
The only problem with D-holes is that they are designed to pull mostly down - vertical - not horizontal. As a result, when you use them, you have to be aware of what your chains, cables, straps and ropes will touch on their journey between vehicles. Typically, you have to either protect the yanker from sharp or hot 4X metal, or the 4X itself from yanker damage. Pay particular attention to the bumper, air dam and body as pictured at the right. In this case, a hard pull will lift the chain and damage the air dam.
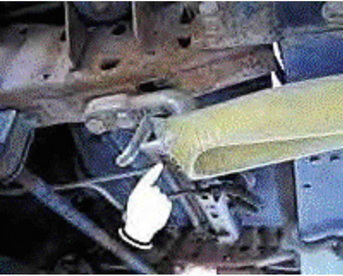
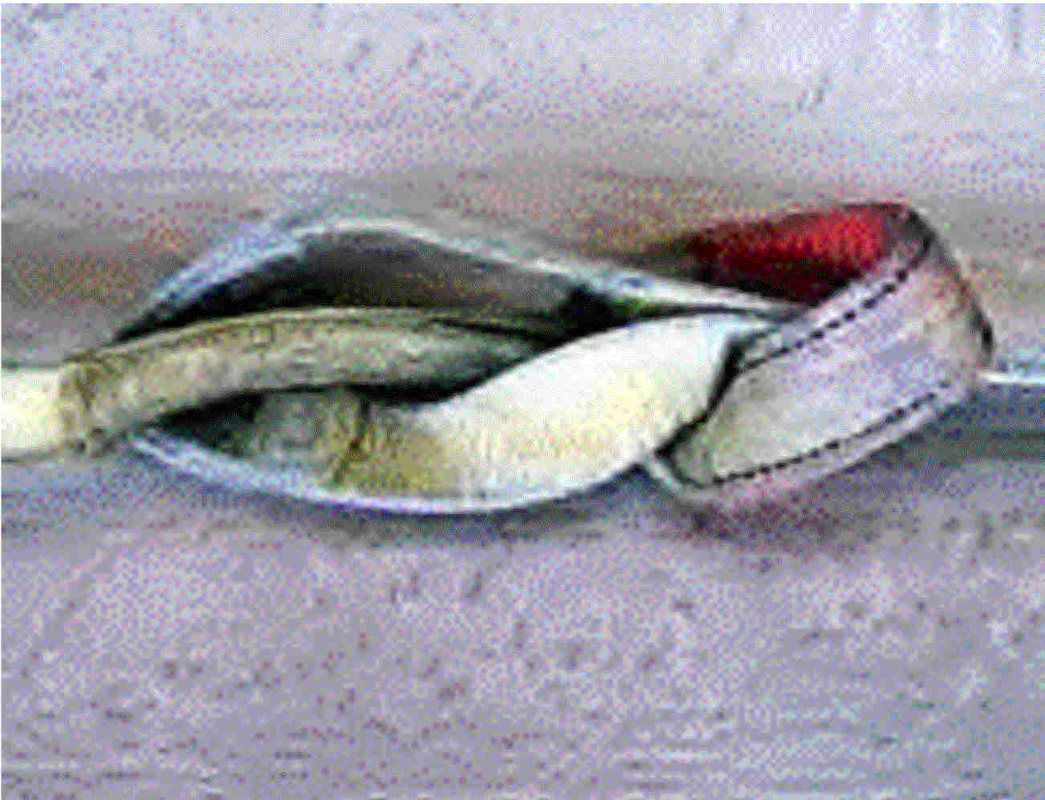
YANK PROTECTORS
Lower radiator hose damage protectors on Towline.
Sharp and hot things under the 4X can cut and burn yankers. Cuts and burns weaken the yanker and thereby make it more prone to break. Here's my preventative measure.
I have two pieces of lower radiator hose that are an integral part of my yanker. The yanker is threaded through both hoses (see image at left). After the hook is in place, and before I leave the installation, I inspect for potential yanker cut and burn points. When found, I simply slide the yank-protector hose to the hazardous spot and tape it in place. The potentially dangerous interference now only gnaws away at the replaceable hose, not the vulnerable yanker.
I use lower radiator hose because it is typically stronger than upper hose. The lower hose is on the suck side of the water pump and must be stronger to keep from collapsing when hot. Go for the ones that have built-in wire reinforcing.
TRAILER HITCH
I'm also reasonably comfortable with a class-III trailer hitch receiver for easy to moderate pulls. It's generally conceded that you stay completely away from using the ball itself. It's thought that if it breaks off, the projectile could be lethal. I agree.
Most yankers have eyes or loops at both ends that fit nicely into the 2-inch square hole. Simply push the eye into the hole, the retainer pin through the hitch and eye, and the two have become one (below left).
Most yankers have eyes or loops at both ends that fit nicely into the 2-inch square hole. Simply push the eye into the hole, the retainer pin through the hitch and eye, and the two have become one (below left).
Insert Towline eye into class III trailer hitch and pin
|
Loop shackle through Towline attach to trailer hitch ball hole
|
For even less aggressive pulls, I use the reinforced trailer hitch ball hole in my rear bumper. I loop a D-shackle through the eye in the towline and attach it to the bumper hole as pictured above right.
HOOK INSERT
Another trailer hitch product I've seen is a special insert that slips into the hitch receiver with a protruding hook. The gozinta part is just like a ball insert. It's made of heavy stock and uses the hitch-pin to lock it in place. Just outside the receiver is a conventional tow hook. I particularly like this because you can place the hook either up or down depending on the up-down hill direction of the pull. For relatively flat pulls, I think hook-up is best since it tends to keep the towline eye in place.
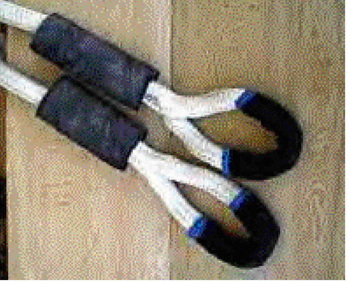
COYOTE CHAIN
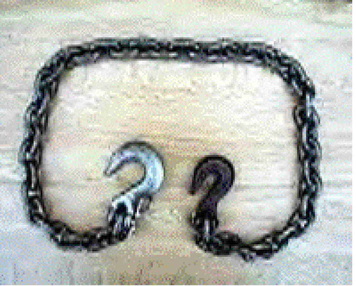
Three-foot Coyote chain with choke hook on left and grab hook on right
Nine times out of 10, I'm faced with a stuck newcomer that has no accessory hooks or loops on his 4WD. For this I've fabricated a special chain. The three feet long, the chain has a grab-hook (right) at one end and a choke- or slide-hook (left) at the other end.. A grab-hook is designed to lock (grab) onto any chain link. The choke- or slide-hook has a more open end and easily slides up and down the chain. Typically, the grab-hook will not fit into a D-hole, but the choke-hook will, due to the more open nature of the throat.
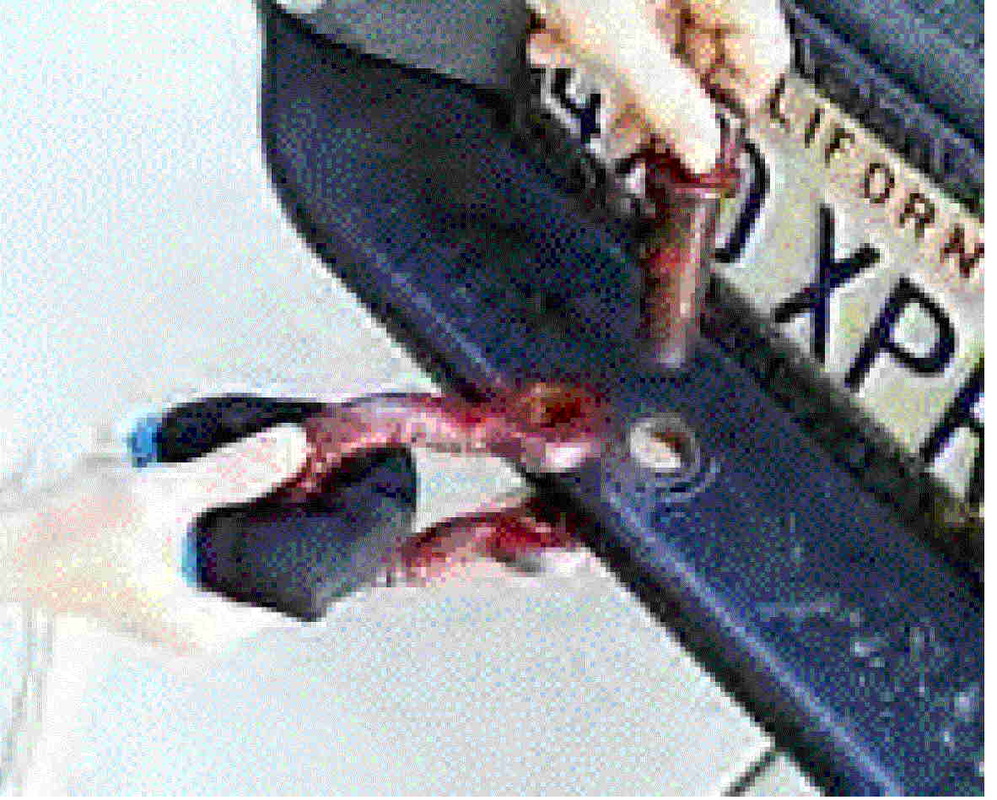
I secure the choke-hook to the frame in a D-hole. The chain then exits just beyond the nearest bumper. I feed the loose end through the yanker eye and lock the chain back onto itself with the grab-hook . The below left images shows the WRONG way to do it and below right image needs a few more words.
I secure the choke-hook to the frame in a D-hole. The chain then exits just beyond the nearest bumper. I feed the loose end through the yanker eye and lock the chain back onto itself with the grab-hook . The below left images shows the WRONG way to do it and below right image needs a few more words.
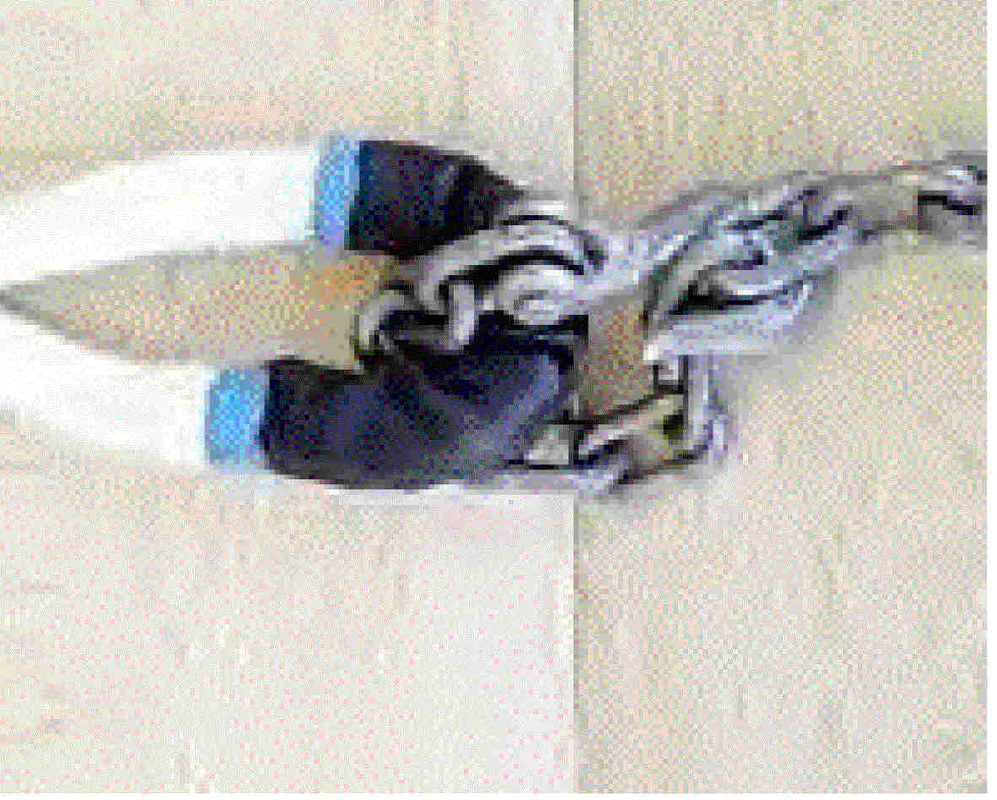
WRONG! A grab hok attached this way stresses the hook
|
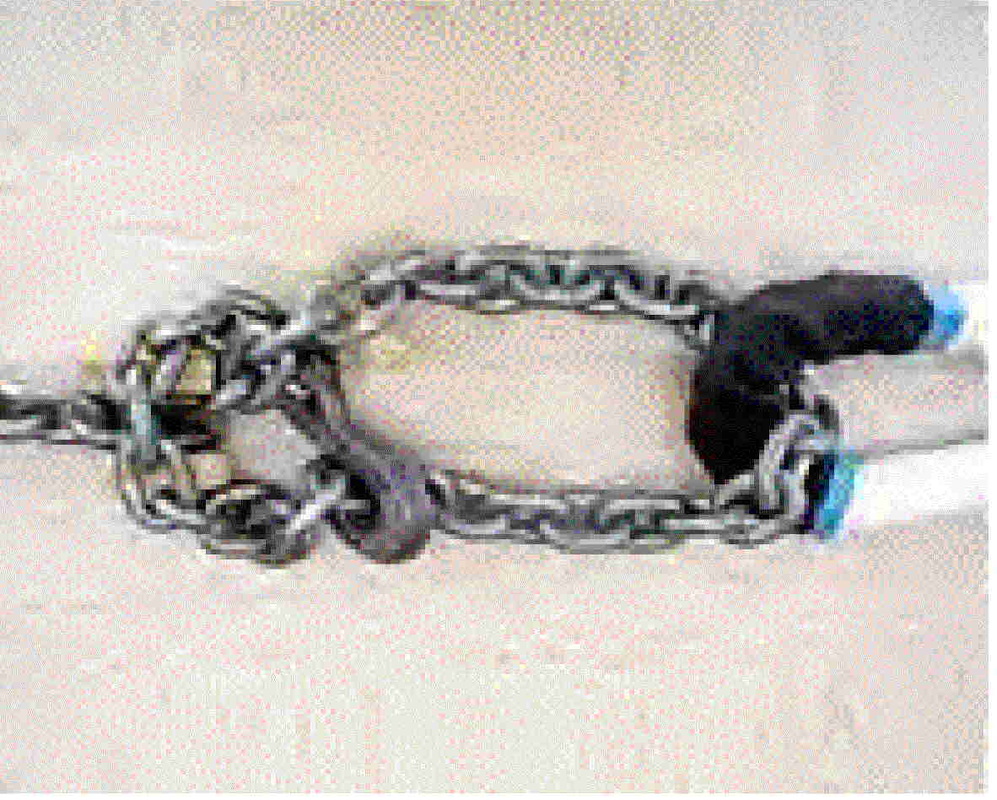
CORRECT! A grab hook attached this way does not stress the hook
|
The above left arrangement can break a tow hook. Starting left (with the right image), the chain goes through the towline eye, then back over and under the approach on the left and finally hooks onto the piece coming out of the eye, not the original approach section. I essence this is a chocker of a sort. This method puts all the strain on the chain and does not stress the hook.
I actually carry two in case I have a newcomer on both ends of the tow operation. The chain also doubles for repairs. When I broke my radius arm on a San Felipe, Baja trip, they were used to secure the lame front axle in place until I could get to a welder. To purchase a Coyote chain call Ecological 4-Wheeling Adventures.
I actually carry two in case I have a newcomer on both ends of the tow operation. The chain also doubles for repairs. When I broke my radius arm on a San Felipe, Baja trip, they were used to secure the lame front axle in place until I could get to a welder. To purchase a Coyote chain call Ecological 4-Wheeling Adventures.
MOUSE THE HOOK
Improperly or unmoused yanker can lead to strap damage!
You want to ensure that the towline's attach-eye will stay in place on the hook. If the eye falls off, it's obviously no good, but simply annoying. Partially on (or off) is worse! The hook could pierce the yanker (see image at left), reduce the strength and tear the line apart. Some hooks come with a spring mouse that holds the Towline eye in place. With an open hook or any questionable attach point, use tape, a plastic tie or something to insure the eye stays in place. The mouse term comes from sailors and riggers
READY THE YANKER
Attached Towline, draped back on hood, ready for action!
I'm getting a little ahead of myself with this and the next tip, but this one may help you stay a little cleaner. Even if you're not yet stuck, but see a lengthy stretch of mud or dirty tough going ahead, do this. Attach and mouse the yanker to your 4X. Drape it out of the way back through a window or coil it on the roof rack. I've seen some folks wrap it around the bumper, but by the time you're stuck, the yanker may be under the mud. Now, if you get stuck, you can climb out the window and toss the towline out to your pull without getting too dirty.
COLD CONCERN
In freezing cold weather, you may be faced with another unexpected surprise. You work your tail off to rescue your buddy. Come go-home time, you find your rope frozen stiff and impossible to fit back into your 4WD. I find thawing and bending it around a warm (not too hot) tailpipe will get the inflexible, stubborn assistant back in the truck for further thawing
YANKER LENGTH
As I wrote in Yankers Away (September/October issue), my yanker is always the wrong length. It typically puts the tow vehicle right in a ditch, up a hill or just around a corner. I'd like to be directly ahead of or behind my stranded companion, on level ground. To change the length of a flat strap takes extra caution and some skill. With a Master-Pull® round towline, it's a cinch. Use a bowline in the round line to shorten it. Then, even after being stressed, it's no sweat to undo. The September-October issue also showed how to tie a bowline and the secret to untying flat straps
Loop-through-loops can become permanent!
|
WRONG! Never use a shackle (cannonball) to attach two yankers!
|
For added length, you can resort to looping a couple of lines together, but again, beware of the flat yellow yankers. Even something as elementary as a loop-through-loop (above left) can become impossibly permanent. It creates kind of a square knot. And never use a shackle to connect two yankers (above right). If either yanker breaks, the massive metal shackle becomes a substantial cannon ball.
YOKES
Ya yokemup to shorten 'em up. That's where you make the towline form a V. However, yoking up has its limitations and I only recommend it for towing, not tugging. Without fully explaining the reason, as the branch-legs of the yoke get shorter and shorter, the forces on the legs get greater and greater. It doesn't make sense to the nonengineer, but it has to do with the same principle as to why sailboats can sail into the wind. Beware of very short branch legs regardless of the material.
TOW LENGTH
For tows back to camp, length is of even more concern. You're concerned with length for safety and functional reasons. Too short a yanker puts the towed vehicle dangerously close to the puller's tail. Puller may react faster than pullee and smash into his help. I have two short tales about too long.
I'm towing broken Bronco on twisting Baja dirt road. As I round a tight corner, I slow, he slows slower, introduces slack, which he drives over and wraps around the inside of his front wheel. A fraction of a second later, the strap tightens and breaks the flexible hydraulic brake (fluid) hose. Not too cool! Malfunctioning brakes on the 4X behind are bad news, particularly for the guy ahead! Yanker was too long!
I'm towing broken Commanche around a mountainous hairpin turn. He does a better job with the slack and I pay less attention. The blasting horn tells me something is wrong. Picture we're on opposite sides of the hairpin turn, pointed in opposite directions, and I'm now dragging him sideways into the cavernous "no-road" center portion. Yanker was too long!
HOW TO TOW
For long tows like back to camp or on the road (when legal), the yanker must be safely long enough to accommodate reaction time, but not too long so as to introduce tracking errors. On the highway, too long may also entice unknowing others to pass and try to pull in between the two attached vehicles. By the way, it is illegal to use a towline on California freeways and interstates (CA Vehicle Code, section 29006a). The vehicles must be connected with a rigid tow bar. Know your state's laws before you learn the costly way.
The towee's responsibility is to keep the yanker taut at all times. Even the slightest amount of slack can get dangerously tangled in vital running gear. He does this by applying just the right amount of brake at just the right times.
The tower's responsibility is to make sure he doesn't drag the victim off the road on a tight turn as I almost did above. An extra person in each vehicle, with radio-mic in hand, adds instant feedback. Otherwise, both front and back vehicles should agree on specific hand signals prior to taking off.
When taking off, the towee should gently apply his brakes to ensure a taut towline. He should slightly drag the brakes for a 100 feet or so, or until rolling friction ensures he won't surge or coast ahead. With a stick shift, this means Mr. Towee should slightly apply his brakes during each shift, too.
To ensure that slowing and stopping does not introduce slack, it is the responsibility of the front vehicle to radio or signal back he's changing pace. The back vehicle must then slow or drag the front guy to a stop. On a downhill, this means the rear 4X drags his brakes to eliminate slack. To safely take off, shift, turn, slow down and stop perfectly is much harder than it may sound. But that's definitely less stressful and safer than tuginum.
TUGGING BASICS
Getting unstuck requires more preparation and serious attention to safety. TUGGING BASICS will be covered in the January/February issue of Ecological 4Wheeling Adventures.
© Harry Lewellyn
Ecological 4-Wheeling Adventures
2234 Catherine Pl.
Costa Mesa, CA, 92627-1815
Phone (949) 645-7733
FAX (949) 645-7738
E-mail: [email protected]
http://4wdadventures.com